
How does our program think?
Five small programs, five important ideas
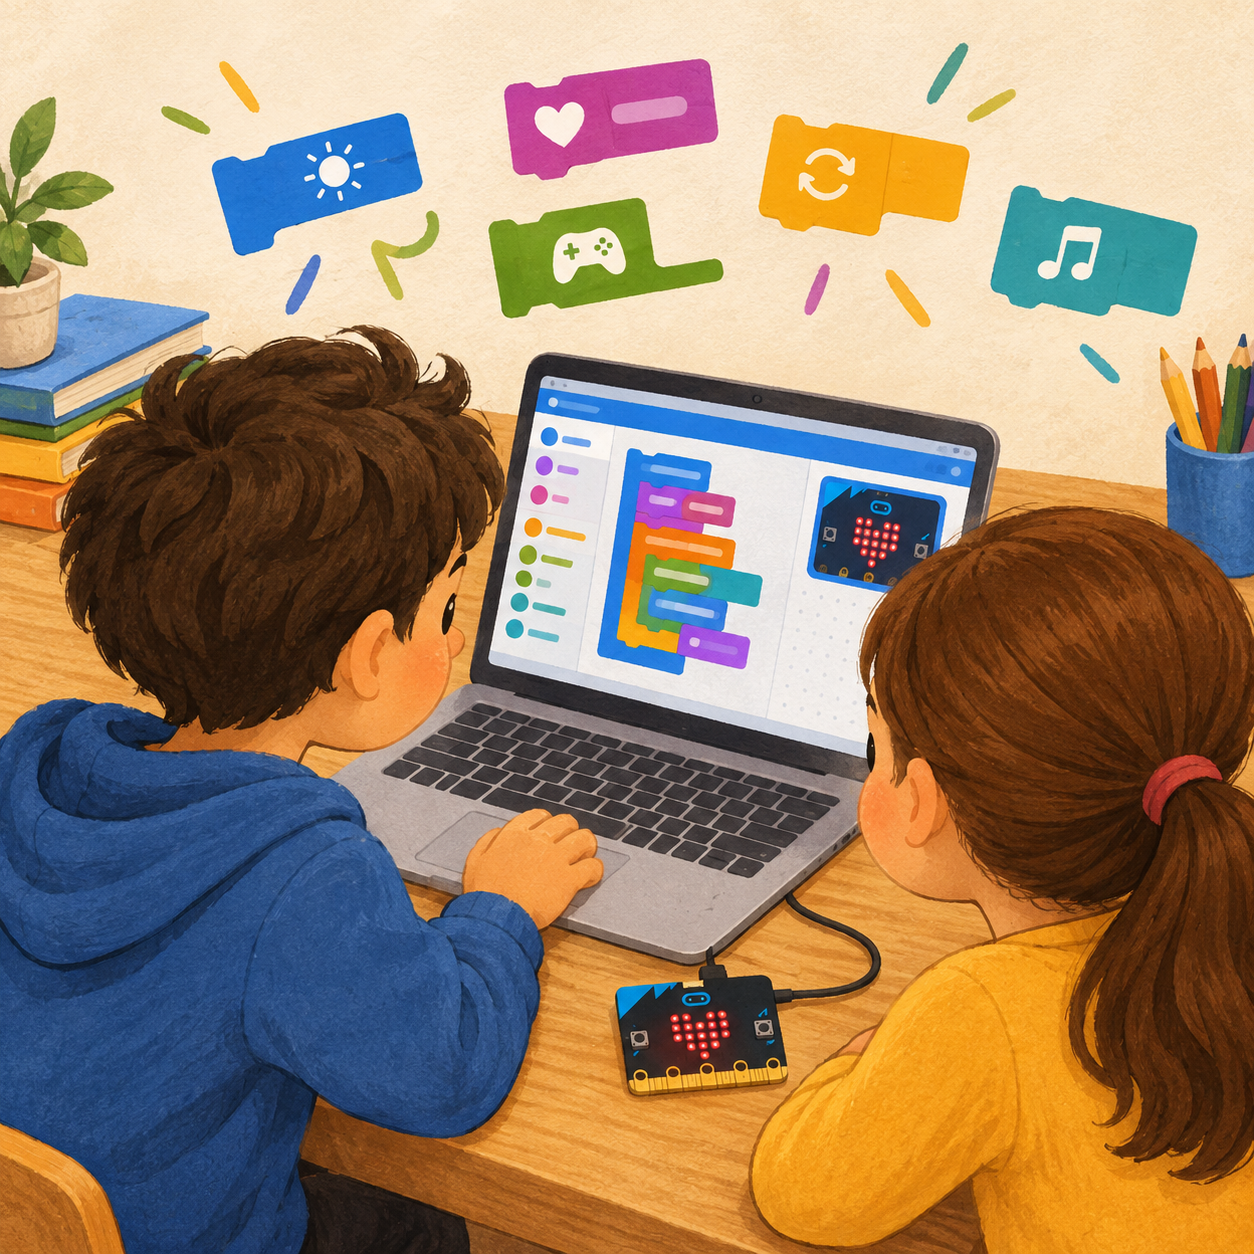
In the last workshop we made five programs for the micro:bit in MakeCode: a greeting, a beating heart, a reaction to buttons A and B, a digital dice and a score counter.
Today we won’t just put them together again. We will find out why they work the way they do.
For each program we will try to answer four questions:
- What starts the program?
- What does the micro:bit do next?
- Does it do it once, all the time, or only when something happens?
- What will change if we change one block?
This is how we will work:
predict ⇒ run ⇒ change one thing ⇒ test again ⇒ explain the result
Programming isn’t just putting blocks together. Programming is also understanding what we have put together.
To start: what will happen?
Don’t open the computer yet. First try to answer without running the program.
The workshop leader will show four little plans. For each one, say what you expect:
- Show a name. Then show a heart.
- Keep showing a big heart, then a small heart.
- When I press A, show A.
- When I shake the micro:bit, show a number from 1 to 6.
Think: which program does something straight away, which one repeats something, and which one waits for you to do something?
You don’t have to guess every answer. What matters is that you start predicting before you press Play.
Program 1: Hello, micro:bit!
Technique: commands have an order
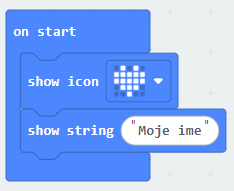
Our first program looks like this:
WHEN THE PROGRAM STARTSSHOW MY NAME
SHOW A HEART
END
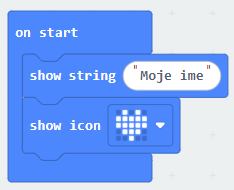

In MakeCode, the show string and show icon commands are placed inside the on start block.
When the program starts, the micro:bit first shows the name and then the heart. on start is for actions we want to run at the beginning; the show string block shows text on the LED screen.
Predict
Before testing, answer:
- What will be shown first?
- Will the name keep showing all the time?
- What will be on the screen after the name has scrolled past?
Try it
Run the program in the MakeCode simulator. Watch the whole sequence, not just the last picture.
Change one thing
Swap the commands round:
WHEN THE PROGRAM STARTSSHOW A HEART
SHOW MY NAME
END
Conclusion: The order of the blocks changes the order of the actions. If we want a different result, sometimes we don’t need a new block – it is enough to move one that is already there.
Extra challenge
- Add a third command: show your favourite number. Ask a friend to guess the order in which the name, the heart and the number will appear.
Program 2: A beating heart
Techniques: repeating and waiting
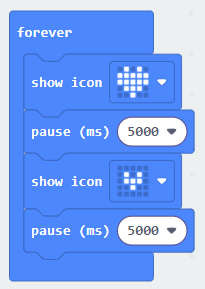
In the second program we use forever:
REPEAT ALL THE TIMESHOW A BIG HEART
WAIT HALF A SECOND
SHOW A SMALL HEART
WAIT HALF A SECOND
END
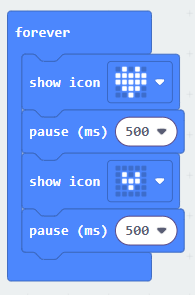
forever keeps repeating the commands inside it. The pause block sets how long the program waits before it carries on. The time is written in milliseconds: 1000 ms is one second, and 500 ms is half a second.
Remember
forever repeats, and pause slows things down. They don't do the same job.Predict
- Will the heart beat only once, or many times?
- Do you think it will beat faster if we change the pause from 500 ms to 100 ms?
- And what will happen with a pause of 1000 ms?
Try it
Run the program in the simulator and watch it repeat a few times.
Change one thing
Change both pauses to 1000 ms. Test again. Then change them to 100 ms.
Remember
Don't change the icons and the time at the same time. When we change only one thing, it is easier to know why the result is different.Extra challenge
- Make your own animation from two pictures. For example, show a smiley face and a surprised face one after the other. Choose a pause that lets you see the change clearly.
Program 3: Button A and button B
Technique: the program reacts to an event
Until now, the micro:bit either did something straight away at the start or kept repeating a task. Now it can wait for us to press a button.
Here we use an event:
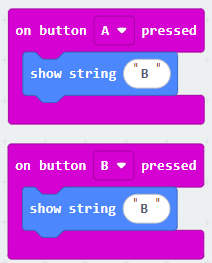
WHEN BUTTON A IS PRESSED
SHOW THE LETTER "A"
WHEN BUTTON B IS PRESSED
SHOW THE LETTER "B"
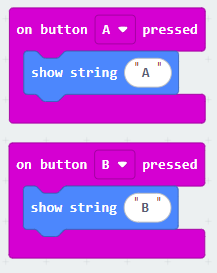
We call pressing a button an event. The on button A pressed block tells the micro:bit which commands to run when that event happens. MakeCode lets us react separately to A, B and A+B.
Predict
- What will happen if we don’t press any button?
- What will be shown when we press A?
- Can the command for button B run when we press A?
Try it
In the simulator, press A and then B. On a real micro:bit, press the buttons with your finger.
Change one thing
Make button A show a happy face and button B a sad face. Before testing, check that you have put the right icon in the right block.
Conclusion: A program can have several parts that wait for different events. They don’t all run straight away, one after another.
Extra challenge
Add a reaction to A+B: make the micro:bit show a heart. Check whether the program can tell the difference between pressing only A, only B, and both buttons together.
Program 4: A digital dice
Techniques: an event and a random number
The digital dice doesn’t show a new number all the time. It waits for us to shake the micro:bit gently.
Here we use an event too:
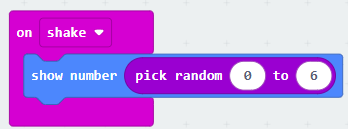
WHEN THE MICRO:BIT DETECTS A SHAKE
PICK A RANDOM NUMBER FROM 1 TO 6
SHOW THE NUMBER THAT WAS PICKED
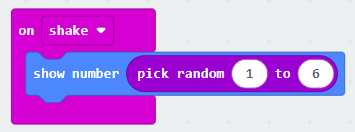
Shaking is an event, just like pressing a button. MakeCode can react to the shake gesture, and the block for a random whole number picks a value in the range we give it – including the smallest and the largest number. So the range 1–6 can give both 1 and 6.
Predict
- Can the number 0 appear?
- Can the number 7 appear?
- Will every shake give a different number?
- Should the number change if you are just looking at the micro:bit lying on the table?
Important
Random doesn't mean that every next number has to be different. A real dice can also show the same number twice in a row.Try it
Run the program in the simulator and make it shake. If you are using a real micro:bit, shake it gently. Don’t throw it and don’t pull the USB cable.
Change one thing
Change the range of numbers from 1–6 to 1–3.
Now run the program ten times and write down the numbers that appeared. Can you see any number outside the new range?
Extra challenge
Make a dice with the numbers 1–10. Before testing, say what the smallest and largest possible results are.
Program 5: A score counter
Technique: the program remembers a value
This program brings in a new idea: a variable.
A variable is like a little box with a name. Our box says score on it, and inside it we keep a number that can change.
Before we work in MakeCode, let’s imagine it with a box and a few counters:
- An empty box means we have 0 points.
- Every press of button A adds one counter.
- Pressing button B doesn’t add a counter; it asks us to count how many we already have.
The program works the same way:
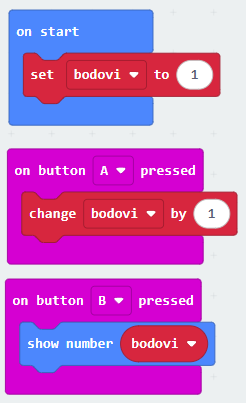
WHEN THE PROGRAM STARTS
SET SCORE TO 0
WHEN BUTTON A IS PRESSED
INCREASE SCORE BY 1
WHEN BUTTON B IS PRESSED
SHOW SCORE
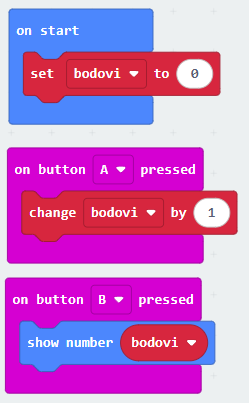
The MakeCode examples use a variable to count button presses and the show number block to show the saved value.
Predict
At the start, score = 0.
- If we press A once, what is the score?
- If we press A two more times, what is it then?
- If we then press B, what will the micro:bit show?
- Will just pressing B increase the score?
Build it and test it
In the Variables category, make a variable called score. Then, in the right blocks, add setting it to 0, increasing it by 1 and showing the number.
- Press A three times, then B. Compare the result on the screen with your prediction.
An important difference:
A changes the saved number, and B shows it. The number can change even if we don't see the change on the screen straight away.Change one thing
Change the increase from 1 to 2. Run the program again, press A three times, then B. What number do you expect?
Extra challenge: reset
Add an A+B event that sets score to 0. After the reset, press B again and check the result.
Reset means going back to how things were at the start. We will use a rule like this in other projects too.
Final challenge: Break it, then fix it
Each pair chooses one task. First explain what is wrong, then change only what is needed and test the program.
1. Problem: The greeting shows the heart before the name, but we want it the other way round
Clue to explore: Look at the order of the commands
2. Problem: The heart beats too slowly
Clue to explore: Look at the values in the pause blocks
3. Problem: Button A shows the answer meant for button B
Clue to explore: Look at which commands are in which event
4. Problem: The dice sometimes shows 0
Clue to explore: Look at the smallest number in the range
5. Problem: When the program starts again, the counter doesn’t start from 0
Clue to explore: Check how the starting value is set
For each task, say:
- We think the problem is in ______.
- We will change ______.
- We expect that ______ will happen.
- After the test, we saw ______.
If the result isn’t what you expected, don’t change all the blocks at random. Go back to the program and check one idea at a time.
How do we know we have understood?
It isn’t most important that all five programs look perfect. For one program of your choice, try to explain:
- When does the command run?
- What does the command do?
- Does it repeat?
- Does the program remember a value?
- What did you predict, and what really happened?
If you can answer these questions and change one block on your own, you understand much more than you would by just copying the program.
 What did we learn?
Today we didn’t just run programs. We learnt to predict what the micro:bit will do, change one part of the program and check whether we were thinking correctly.
- A program is made of commands that the micro:bit runs in a certain order.
- on start runs commands at the beginning of the program.
- show string, show icon and show number show text, a picture or a number on the LED screen.
- forever keeps repeating the commands that are inside it.
- pause sets how long the program waits before the next command.
- Pressing a button and shaking are events: the program can wait for them to happen and then react.
- A digital dice can pick a random number from a given range. The same number is allowed to appear several times in a row.
- The variable score keeps a number that the program can change and show later.
- set score to 0 sets the score to zero, and change score by 1 adds one to the number that is already there.
- When a program doesn’t work the way we expect, we check it step by step and change one thing at a time.